THE INFORMATION IN THIS ARTICLE APPLIES TO:
- EFT Web Admin, v3.6 and later
DISCUSSION
- Make a backup of EFT Web Admin application files (e.g. C:\Program Files (x86)\Globalscape\EFT WebAdmin\webapps\)
- Unencrypt your web.config connection strings section:
C:\Windows\Microsoft.NET\Framework\v4.0.30319\aspnet_regiis.exe -pdf "connectionStrings" "C:\Program Files (x86)\Globalscape\EFT WebAdmin\webapps\EFTWebAdmin"

- Open your Web.config (e.g. C:\Program Files (x86)\Globalscape\EFT WebAdmin\webapps\EFTWebAdmin\web.config)
- Change your connection strings section and add the EFTAuthProviderConnectionString connection string. Your connection string should look like:
<connectionStrings >
<add name="EFTWebAdmin" connectionString="Data Source=[SQLSERVERHOST]\[INSTANCE];Initial Catalog=[EFTWEBADMIN_DATABASE]; User ID =[SQL_SERVER_USER];Password=[SQL_SERVER_PASSWORD] "/>
<add name="EFTAuthProviderConnectionString" connectionString="Server=[EFT_ADMIN_HOST];Port=[EFT_ADMIN_PORT];UserID=[EFT_ADMIN_USER];Password=[EFT_ADMIN_PASSWORD];EFTLogonType=[EFT_ADMIN_TYPE]"/>
</connectionStrings>
[EFT_ADMIN_TYPE]: use EFTLogin or NetLogon (Windows Account)
- Use the following membership section:
<membership defaultProvider="EFTAdminAuthProvider">
<providers>
<clear/>
<add connectionStringName="EFTAuthProviderConnectionString" name="EFTAdminAuthProvider" type="Globalscape.EFT.Web.Providers.EFTAdminRolesProvider" />
</providers>
</membership>
- Use the following Role manager section:
<roleManager enabled="true" defaultProvider="EFTAdminRolesProvider">
<providers>
<clear/>
<add name="SqlRoleProvider" connectionStringName="EFTWebAdmin" applicationName="EFTWebAdmin" type="System.Web.Security.SqlRoleProvider" />
</providers>
</roleManager>
- Save Web.config.
- Encrypt your Web.config connection section again:
C:\Windows\Microsoft.NET\Framework\v4.0.30319\aspnet_regiis.exe -pef "connectionStrings" "C:\Program Files (x86)\Globalscape\EFT WebAdmin\webapps\EFTWebAdmin"

- Login to EFT Web Admin using EFT Admin Credentials.
- Verify your new membership provider and role provider is configured correctly.
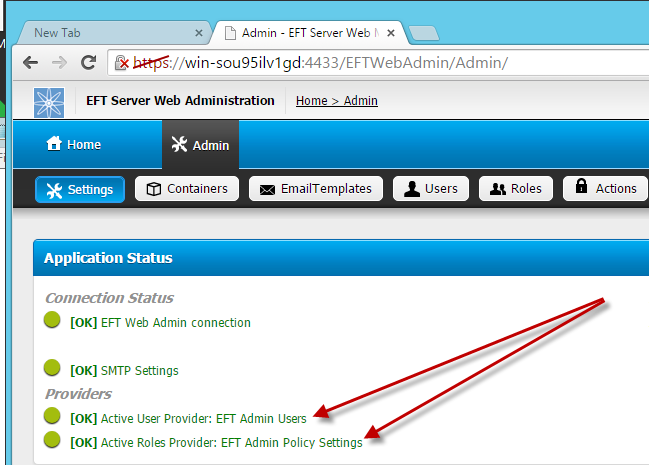
- When you make changes to select different Membership provider or Roles Providers permissions associated permissions don’t necessary apply to the new provider, so it is recommended to check your permissions a assign new permissions to roles or admin users.
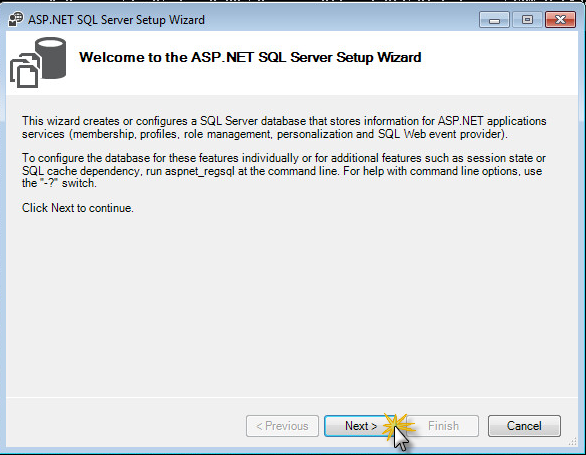
- Run ASPNET RegSql:
C:\Windows\Microsoft.NET\Framework\v4.0.30319\Aspnet_regsql.exe>
- Click Next.
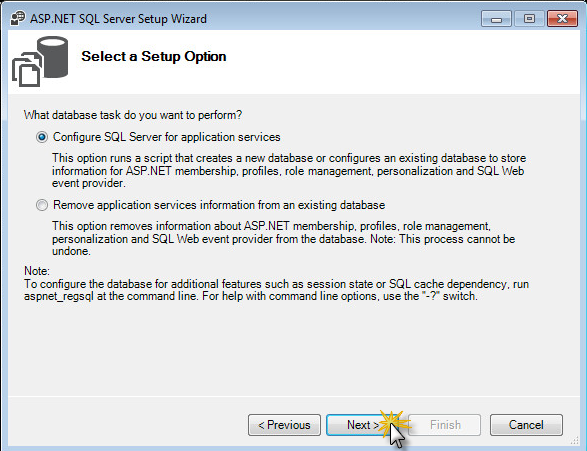
- Select Configure SQL server for application services and click Next.
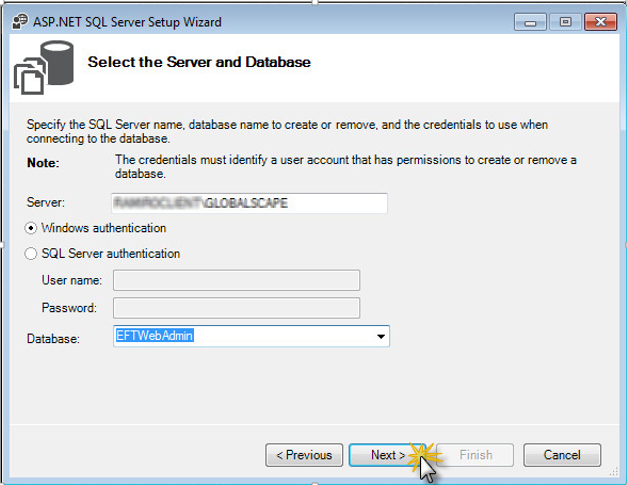
- Enter your SQL Server connection, select your EFT Web Admin Database, then click Next.
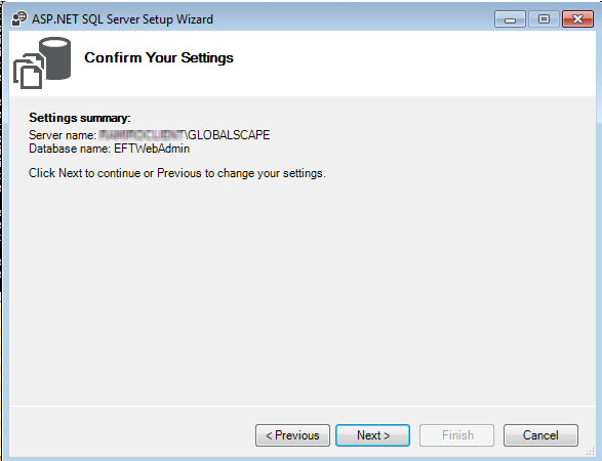
- Confirm your Settings and click Next.
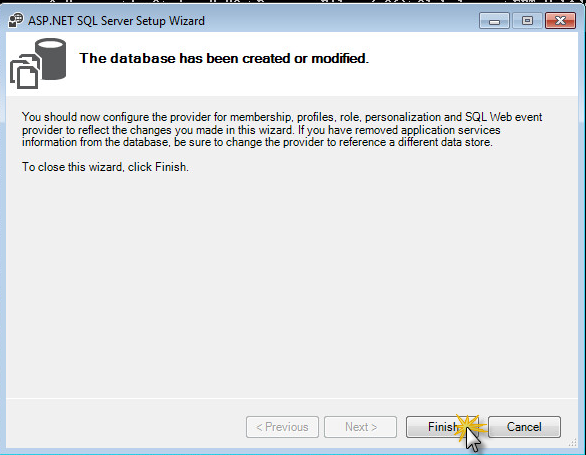
- Then click Finish.
